GP Document Workflow
Webinars
Release Notes
Docman GP 283 - September 2026
Docman GP 281 - August 2026
Docman GP 278 - July 2026
Docman GP 276 - June 2026
Docman GP 272 - April 2026
Docman GP 268 - March 2026
Docman GP 266 - February 2026
Docman GP 261 - November 2025
Docman GP 259 - October 2025
Docman GP 257 - September 2025
Docman GP 255 - August 2025
Docman GP 253 - July 2025
Docman GP 251 - June 2025
Docman GP 249 - June 2025
Docman GP 247 – May 2025
Docman GP 245 – April 2025
Docman GP 241 – March 2025
Docman GP 238 – Jan 2025
Navigation
Intro and Navigation
How to Reset Your Own Password
How to Display the Docman Desktop App Toolbar
How to Activate New Partner Product
How to Add or Remove Homepage Web Links
Patient Documents
Personalisation
Administration / Reception
Filing
NHS Mail Password Maintenance
How to Capture Documents from a Folder
Rejection Codes for Electronic Documents (EDT)
How to enable Auto-Annotate
How to Add Date and Time Stamp Annotation
How to File a Document with Intellisense
How to File a Document with Filing Templates
Create a Document Review - Workflow Template
Create a Document Review - Manual
Create a Document Review - Levels (Sequential)
How to Manage Task Completion Settings
How to Create Folder Collections
How to Access and Use Document Collections
How to Delete Corrupt Documents
Scanning
Admin Tasks
Document Maintenance
Clinical
System Admin
User Maintenance
How to Create a User
How to Edit a User Profile
How to Make a User Inactive
How to Add and Remove User Roles
How to check and switch User Roles
How to Reset a User's Password
How to Create a New User Group
How to Maintain a User Group
How to Give Users Deleted Documents Notifications
Enabling Single Sign On (SSO) for Vision
Enabling Single Sign On (SSO) for EMIS
Filing Maintenance
How Should Intellisense Templates Be Used for Filing Accuracy?
Maintaining Intellisense filing templates
Best Practice for a Department Intellisense Template
Best Practice for a Hospital Intellisense Template
Best Practice for a Result Intellisense Template
How to Move a Document
Restoring a deleted document
Adding a Filing folder
Managing Document Folders
Managing Filing Templates
Creating and Using Custom Annotations
Understanding the NHS Mail Folders
Setting Patient and Document Security in Docman
Task Maintenance
How to Create a Workflow Template
How to create a Workflow Template (video)
How to Enable Auto Start in a Workflow Template
How to Create a Task Template
How to Set the Task Priority in a Task Template
How to Create and Use a Quick Step
How to Create and Use Views
Reporting
How to Access Reports
What Predefined Reports Are Available?
How to Create a User Activity Report
How to Create an Active Task Chart
Read2 to SNOMED Switch
Docman 7 to Docman GP Migration
GP Workflow Assistant
What are Patient Facing Services?
What are Patient Facing Services?
Patient Visibility settings when Filing - No Review
Patient Visibility settings when Filing - Review
Setting Visibility in Workflows or Tasks
Existing documents and setting visibility - Edit Filing Details
Existing documents and setting visibility - Move
Existing documents and setting visibility - Duplicate
Share
Docman Connect
Connect Release Notes
Docman Connect 283 - September 2026
Docman Connect 281 - August 2026
Docman Connect 278 - July 2026
Docman Connect 276 - June 2026
Docman Connect 272 - April 2026
Docman Connect 268 - March 2026
Docman Connect 266 - February 2026
Docman Connect 261 - November 2025
Docman Connect 259 - October 2025
Docman Connect 257 - September 2025
Docman Connect 255 - August 2025
Docman Connect 253 - July 2025
Docman Connect 251 - June 2025
Docman Connect 247 – May 2025
Docman Connect 245 - April 2025
Docman Connect 241 - March 2025
Docman Connect 238 – January 2025
Docman Connect User Guide
Connect API Codes
2 Factor Authentication
Using ‘Groups’ with Connect
Connect API Consumer Creation
Connect Password Rules
Docman Clinical Document Management Console User Guide
Docman Connect Retention Periods
Docman Connect Service Description
Connect Printer Drivers
Docman Connect Inbound Document Model
Referral Management System (RMS)
Docman RMS e-RS User Guide
RMS Training Material Scanning and Filing User
RMS Training Material Clinical User/Consultant
RMS Training Material Appointments/Booking Team
RMS Training Videos System Support
Step by step guide to making the desktop app visible
Configure My Apps for Reports
Forgotten your Docman password?
Technical Documents
Creating a Desktop Shortcut to Docman 10
Docman 10 API Codes
Docman 10 Accepted and Excluded File types
Docman Cloud Enabler App Deployment
Docman Desktop Application Deployment
Docman Desktop Services
Downloads Centre
Postman Configuration Tutorial
Using Docman 10 With a Proxy Server
Turning off the Docman Scheduler
Docman API user activation in EMIS
Warranted Environment Specification (WES)
Customer Support
Table of Contents
- All Categories
- Docman Connect
- Docman Clinical Document Management Console User Guide
Docman Clinical Document Management Console User Guide

Docman Clinical Document Management Console User Guide
What is the Console and what is it used for?
The Docman Console is designed to allow GP Practices that do not use Docman10, to electronically reject documents back to the sender, removing the need to manually return letters.
Setting up your organisation to use the Console
To gain access to the console, submit a request by emailing AHCSupportManagers@oneadvanced.com providing the following information:
- Organisation Name
- Organisation ODS Code
- Full Name of the Admin user (this user will be able to create and manage users for your organisation)
- Email Address (for password resets)
Understanding User Roles
The Rejection Management Console has two user roles:
- Document Receiver
- Document Receiver Admin
The only difference between the two roles is that the Rejection Console Admin has access to the Admin section on the Navigation Bar. The Admin section allows the user to create and manage users for your organisation.
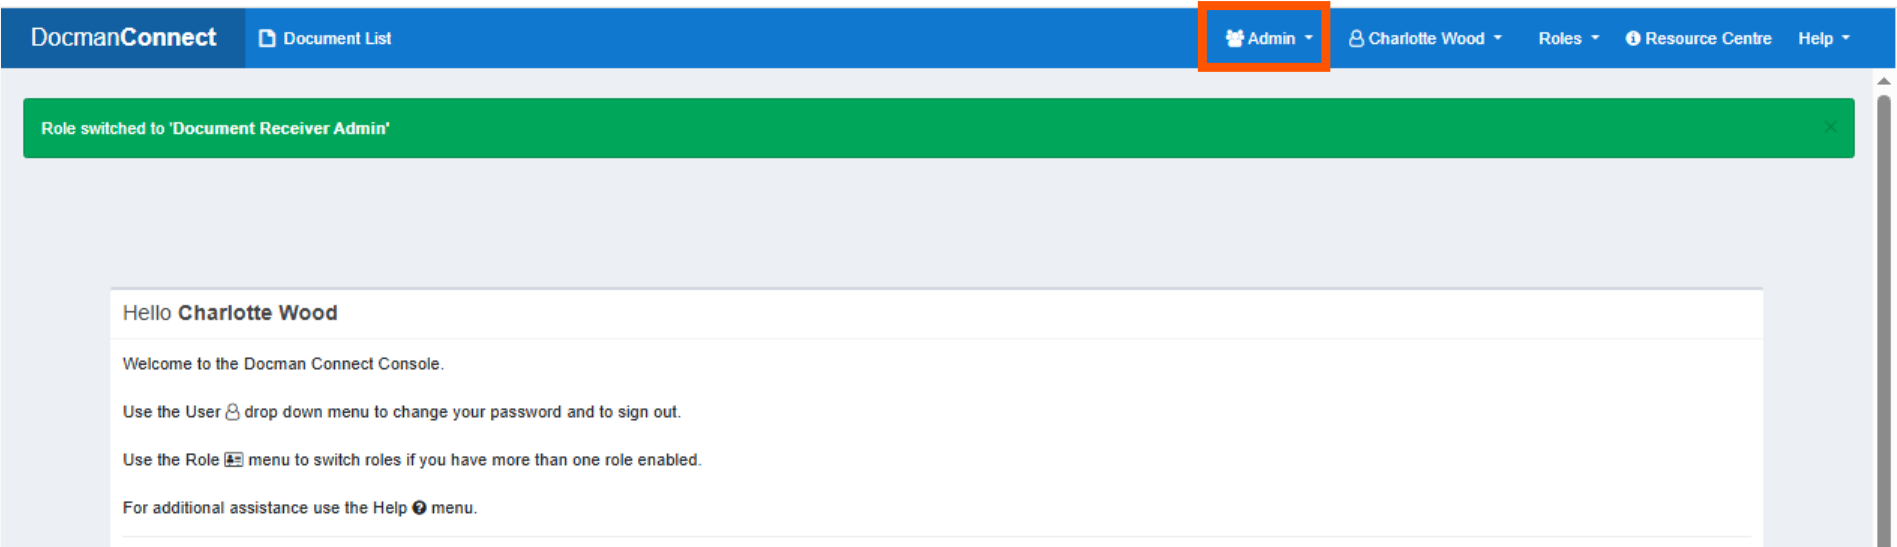
To manage users, select the Admin option on he Navigation bar and select Manage Users.
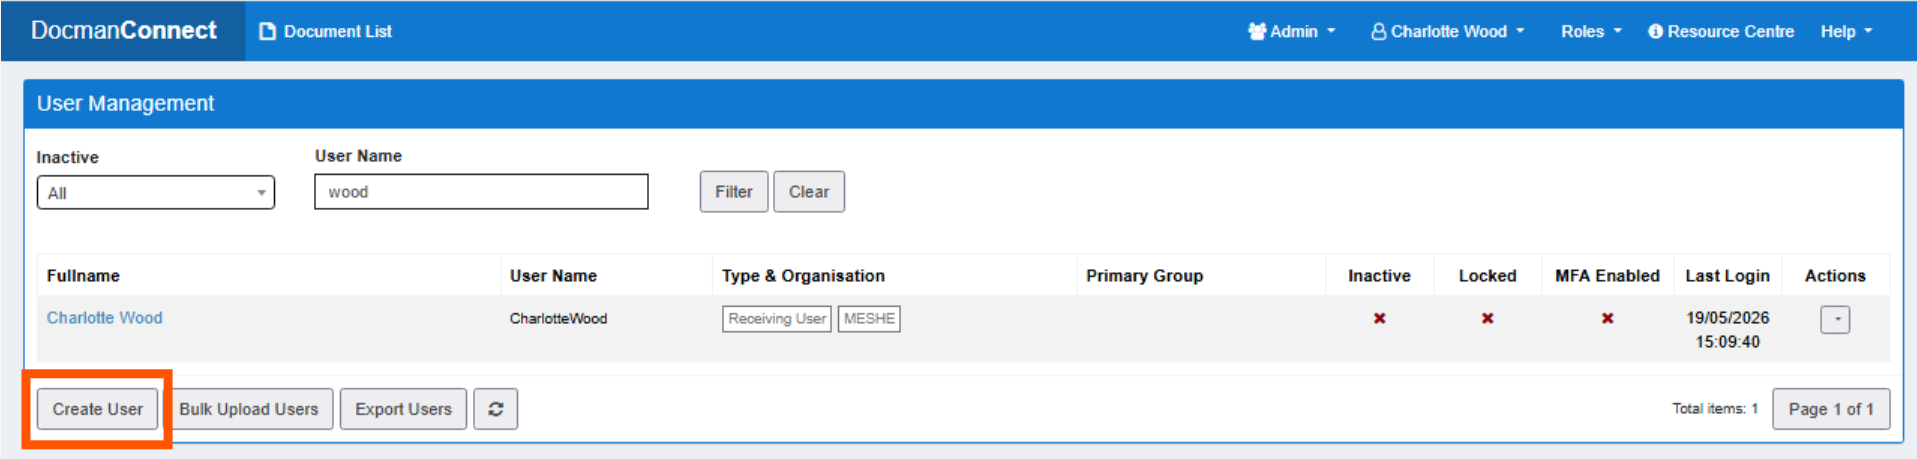
From this page you can Create new users and Manage existing users.
Creating new users
To create new users:
- Select the Admin option on he Navigation bar, and choose Manage Users.
- From the User Management page, select Create User.
The Create User page is displayed.
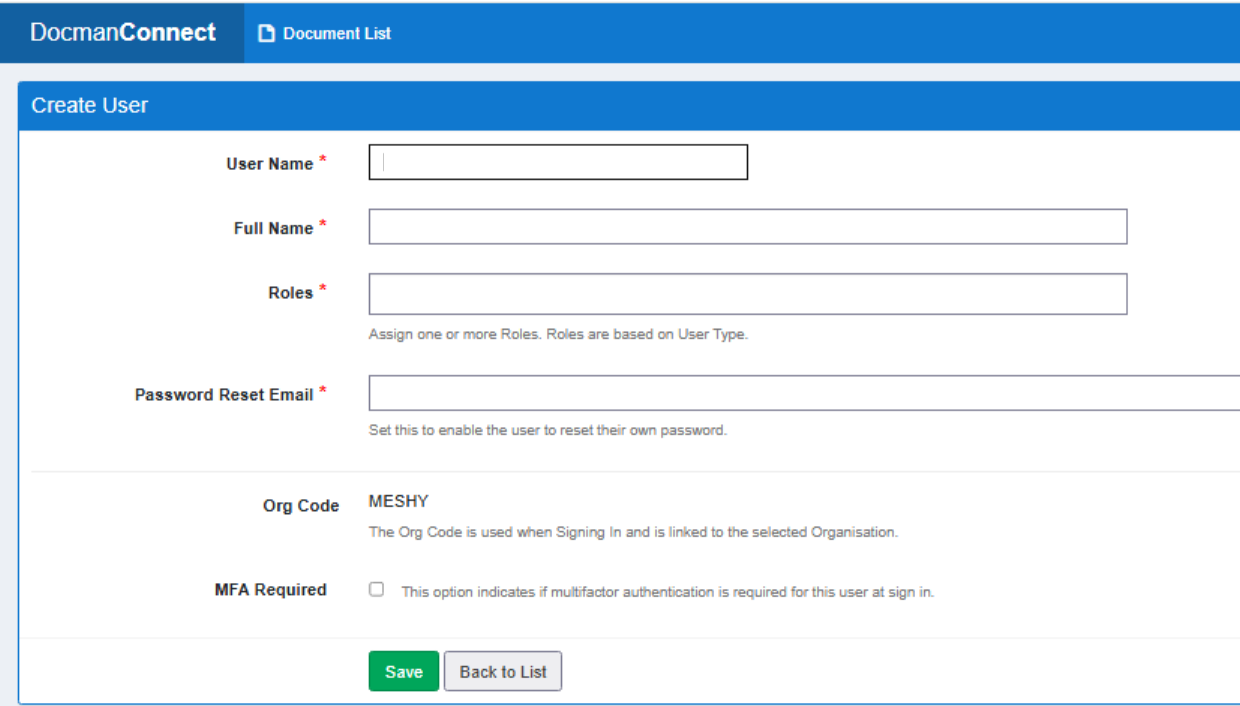
- Complete the User Name and Full Name fields.
- Select the role from the Roles field choosing from Document Receiver or Document Receiver Admin. Choose the Admin role if you want the user to be able to create and manage users.
- Enter the users email in the Password Reset Email field.
- Optional - Tick the MFA Required if you would like the user to use Multi-Factor Authentication to access.
- Select Save to create the user.
The user will then receive an email with their account details and password from no-reply@docman.com, the password is valid for 30 minutes only.
Managing existing users
To manage existing users:
- Select the Admin option on he Navigation bar, and choose Manage Users.
- From the User Management page, select the drop-down button under the Actions header against a user.
- Select Edit User.
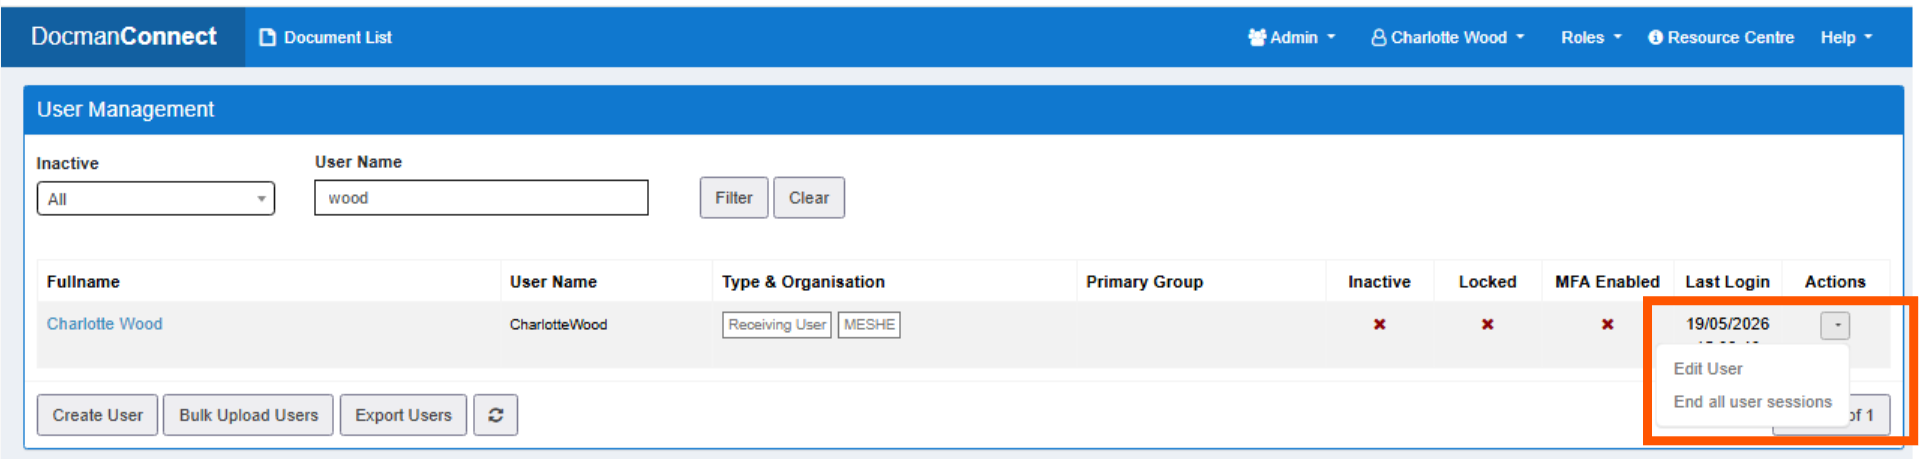
- Here you can edit the user's Full Name, amend the access rights using the Roles section. You can also manage the users Password Reset Email and Reset Password for the user.
- Multi-Factor Authentication (MFA Required) can be enabled for the user from this screen.
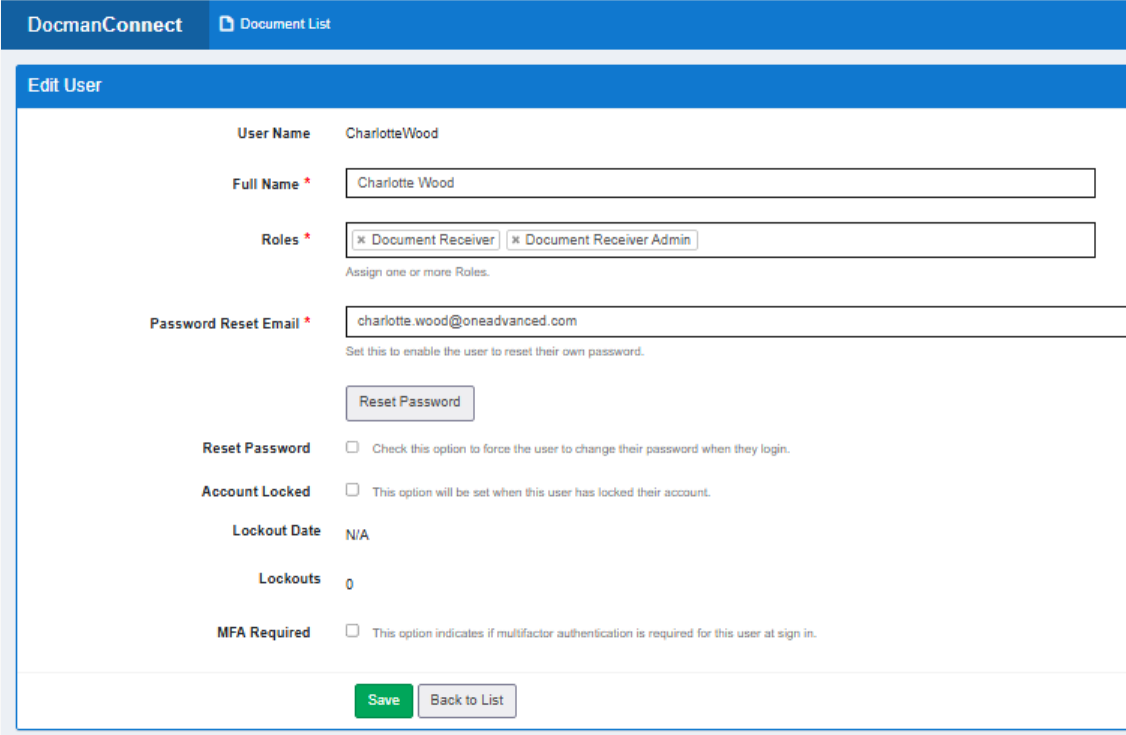
- Select Save once complete.
Best Practice for using the filter
- Under Saved Filters select the Edit button.

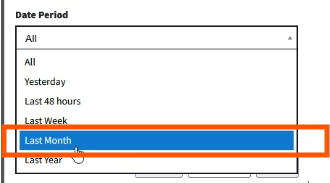
- In the filter under date Period select Last Month
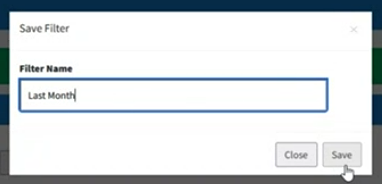
- Click Save Filter and name the filter to Last Month and click Save.
- Under Saved Filters select the Edit button.
- Select the Last Month Filter you have just created, tick the set default checkbox and select Apply at the bottom of the filer.
How to reject documents
- Select the Document List option on the Navigation Bar.

- Select the drop-down button under the Actions header.
- Select View Details.
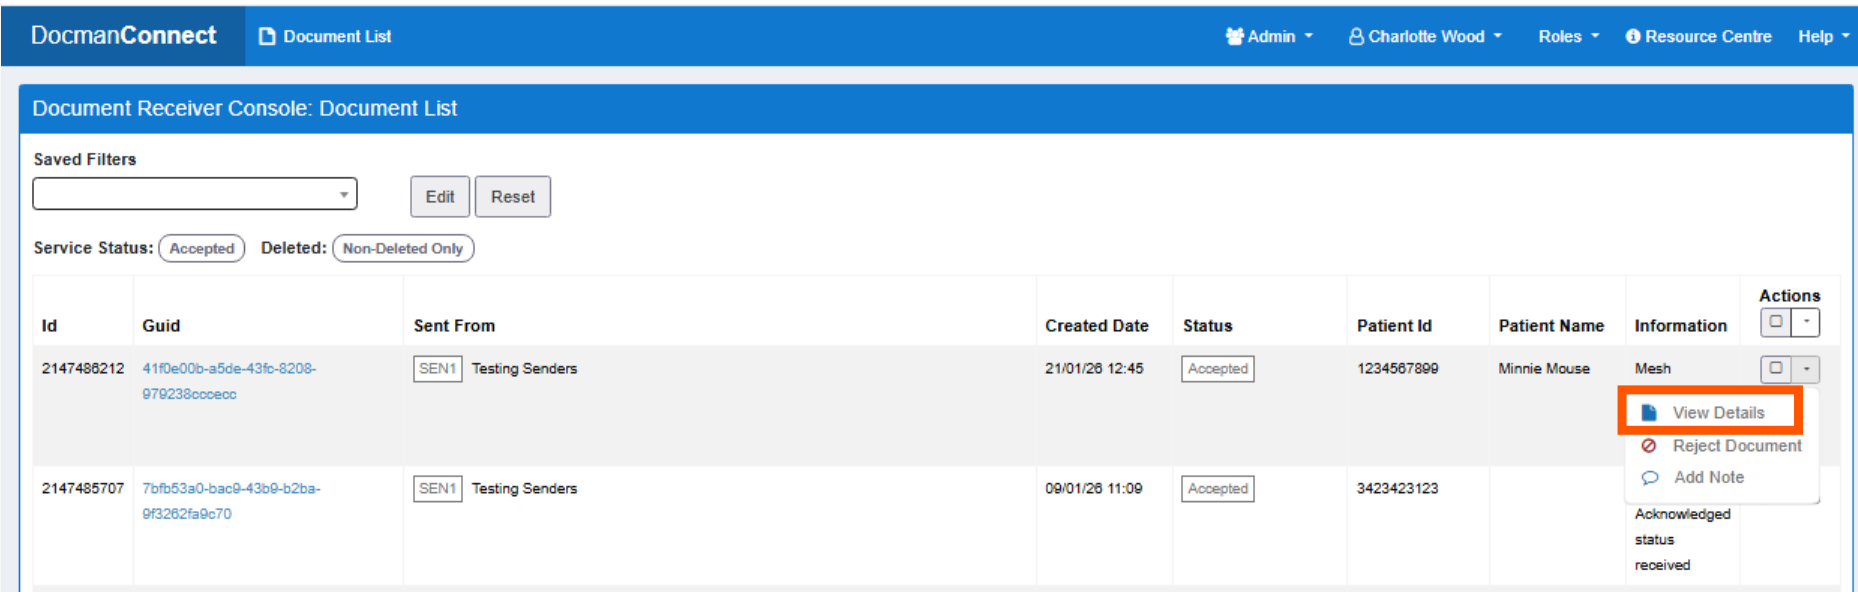
- Check the details of the document on the Document Details and Meta-Data tabs.
- Check the document on the Document Preview Tab to make sure this matches the document you would like to Reject.
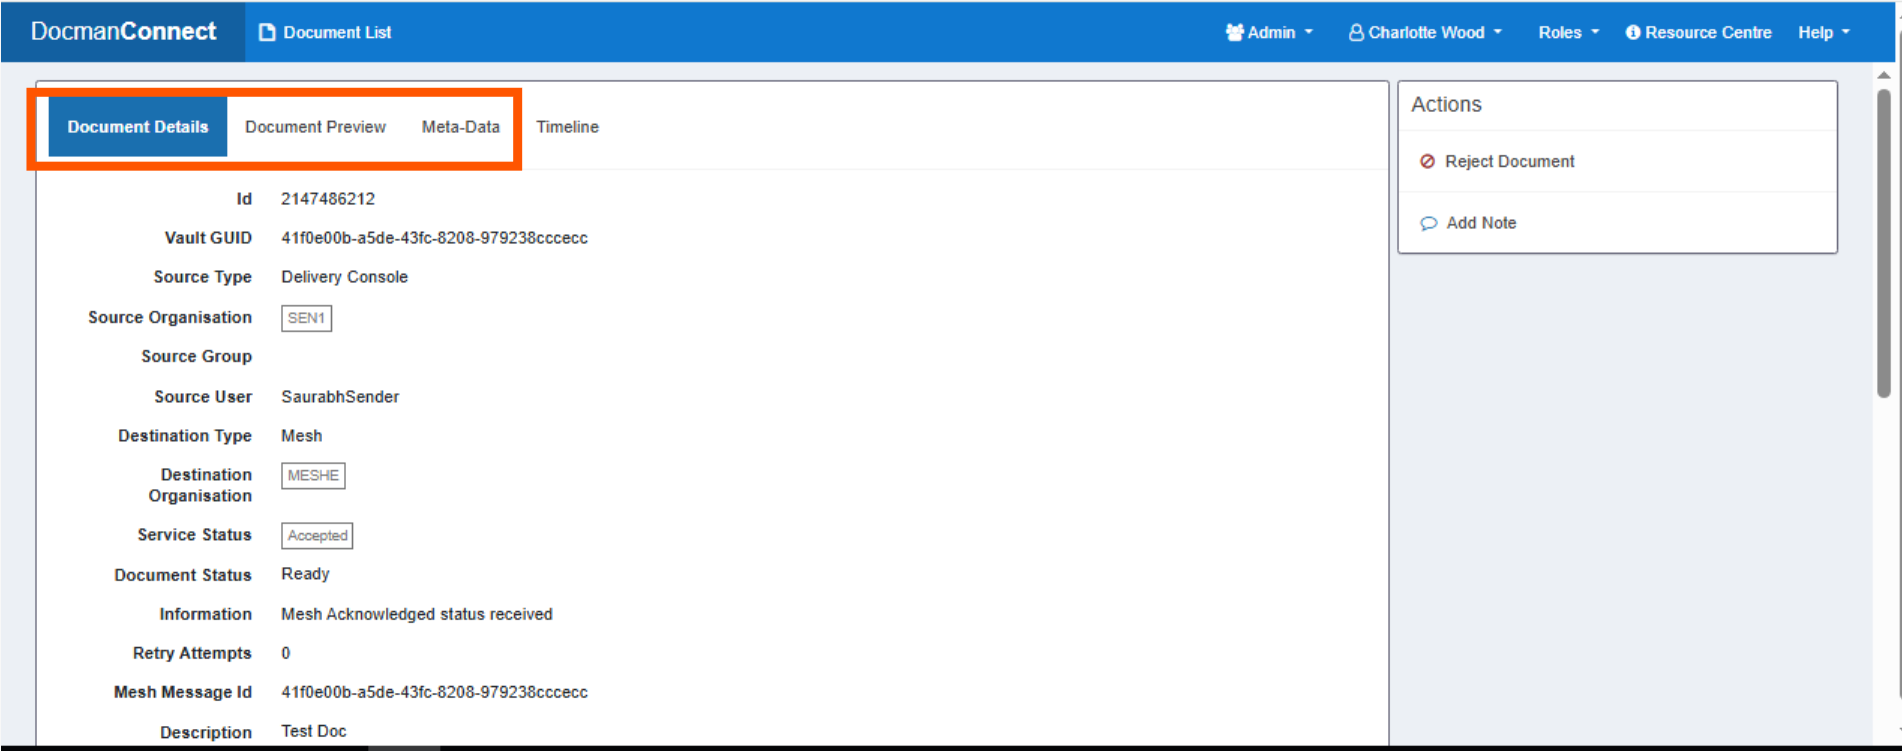
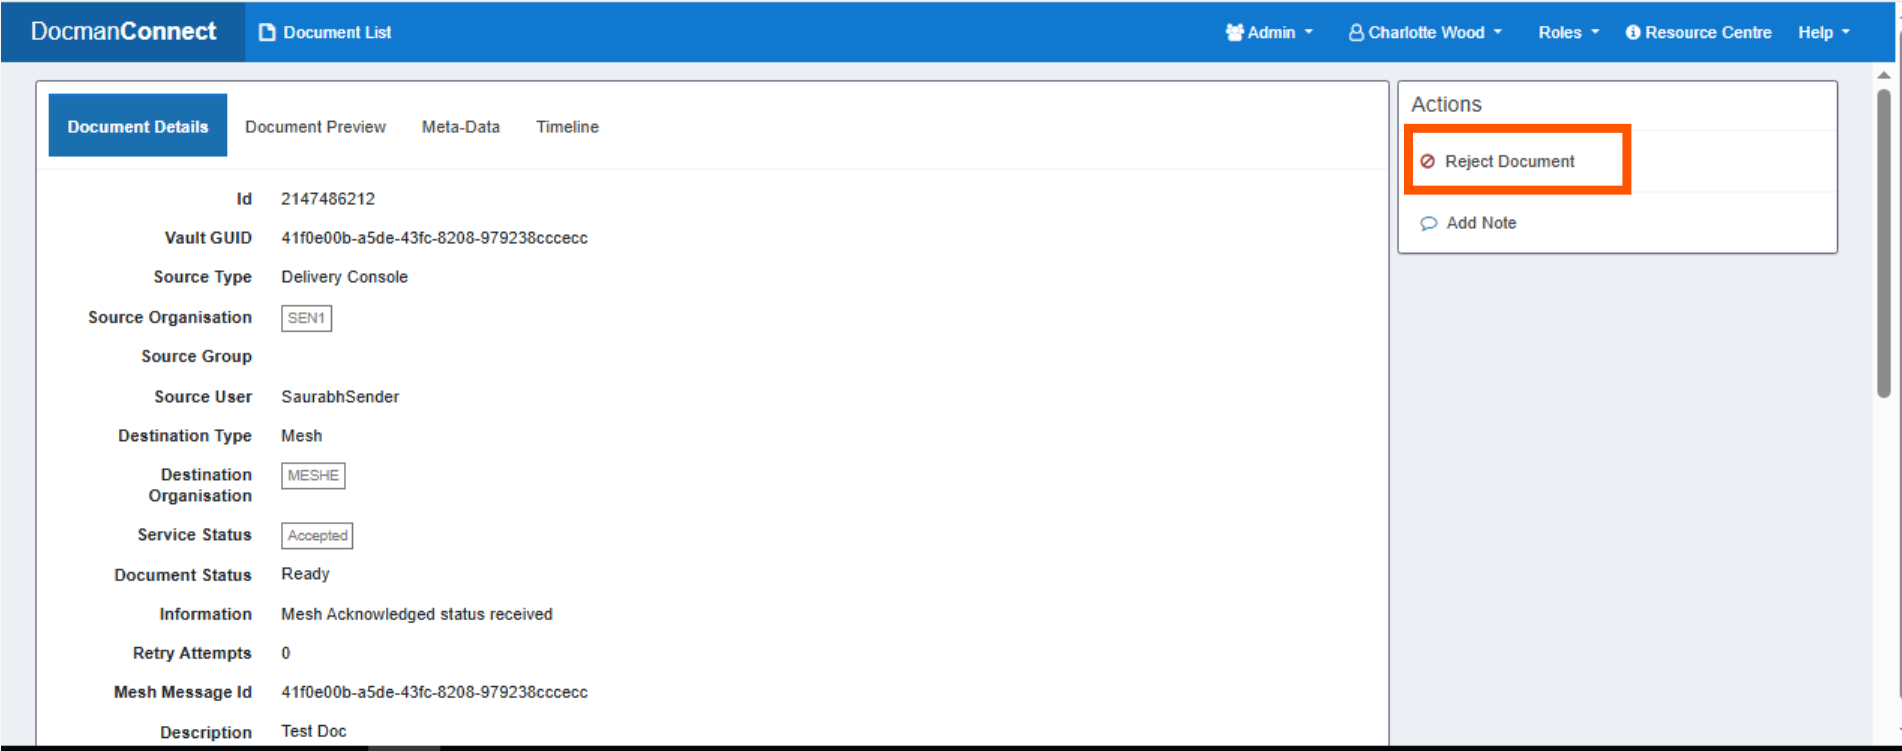
- One you are happy you have found the correct document to reject, select Reject Document under the Actions section on the right.
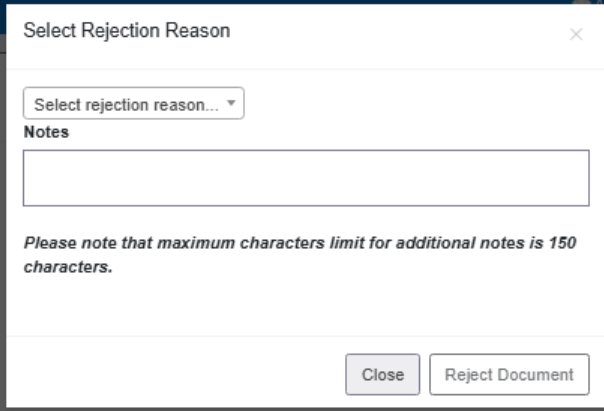
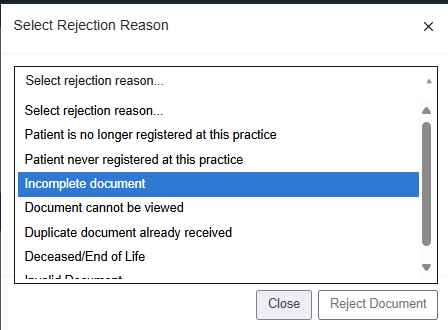
- Select the most appropriate rejection from the options presented and if required, add a note to accompany the rejection to help the sender deal with the next steps. The Rejection Options are:
- Patient is no longer registered at this practice
- Patient never registered at this practice
- Incomplete document
- Document cannot be viewed
- Duplicate document already received
- Deceased/End of Life
- Invalid Document
- Finally, the timeline presents the audit, this can be accessed any time so you can track the actions that have been taken for any documents that have been rejected.
If you have any questions regarding the console, please contact the Support Desk by emailing AHCSupportManagers@oneadvanced.com
Please note: This email is for Console queries only, if you are a Docman10X or Docman Connect user please log a case via the support portal.
Updated on 17th June 2026
