GP Document Workflow
Release Notes
Docman GP 261 - November 2025
Docman GP 259 - October 2025
Docman GP 257 - September 2025
Docman GP 255 - August 2025
Docman GP 253 - July 2025
Docman GP 251 - June 2025
Docman GP 249 - June 2025
Docman GP 247 – May 2025
Docman GP 245 – April 2025
Docman GP 241 – March 2025
Docman GP 238 – Jan 2025
Navigation
Intro and Navigation
How to Reset Your Own Password
How to Display the Docman Desktop App Toolbar
How to Activate New Partner Product
How to Add or Remove Homepage Web Links
Patient Documents
Personalisation
Administration / Reception
Filing
NHS Mail Password Maintenance
How to Capture Documents from a Folder
Rejection Codes for Electronic Documents (EDT)
How to enable Auto-Annotate
How to Add Date and Time Stamp Annotation
How to File a Document with Intellisense
How to File a Document with Filing Templates
Create a Document Review - Workflow Template
Create a Document Review - Manual
Create a Document Review - Levels (Sequential)
How to Access and Use Document Collections
How to Manage Task Completion Settings
How to Create Folder Collections
How to Delete Corrupt Documents
Scanning
Admin Tasks
Document Maintenance
Clinical
System Admin
User Maintenance
How to Create a User
How to Edit a User Profile
How to Make a User Inactive
How to check and switch User Roles
How to Add and Remove User Roles
How to Reset a User's Password
How to Create a New User Group
How to Maintain a User Group
How to Give Users Deleted Documents Notifications
Filing Maintenance
How Should Intellisense Templates Be Used for Filing Accuracy?
Maintaining Intellisense filing templates
Best Practice for a Department Intellisense Template
Best Practice for a Hospital Intellisense Template
Best Practice for a Result Intellisense Template
How to Move a Document
Restoring a deleted document
Adding a Filing folder
Managing Document Folders
Managing Filing Templates
Creating and Using Custom Annotations
Understanding the NHS Mail Folders
Setting Patient and Document Security in Docman
Task Maintenance
How to Create a Workflow Template
How to create a Workflow Template (video)
How to Use Auto Start in a Workflow Template
How to Create a Task Template
How to Set the Task Priority in a Task Template
How to Create and Use a Quick Step
How to Create and Use Views
Reporting
How to Access Reports
What Predefined Reports Are Available?
How to Create a User Activity Report
How to Create an Active Task Chart
Read2 to SNOMED Switch
Docman 7 to Docman GP Migration
What are Patient Facing Services?
What are Patient Facing Services?
Patient Visibility settings when Filing - No Review
Patient Visibility settings when Filing - Review
Setting Visibility in Workflows or Tasks
Existing documents and setting visibility - Edit Filing Details
Existing documents and setting visibility - Move
Existing documents and setting visibility - Duplicate
Share
Docman Connect
Connect Release Notes
Docman Connect 259 - October 2025
Docman Connect 261 - November 2025
Docman Connect 257 - September 2025
Docman Connect 255 - August 2025
Docman Connect 253 - July 2025
Docman Connect 251 - June 2025
Docman Connect 247 – May 2025
Docman Connect 245 - April 2025
Docman Connect 241 - March 2025
Docman Connect 238 – January 2025
Docman Connect User Guide
Connect API Codes
2 Factor Authentication
Using ‘Groups’ with Connect
Connect API Consumer Creation
Connect Password Rules
Docman Connect Retention Periods
Docman Connect Service Description
Connect Printer Drivers
Docman Connect Inbound Document Model
Referral Management System (RMS)
Docman RMS e-RS User Guide
RMS Training Material Scanning and Filing User
RMS Training Material Clinical User/Consultant
RMS Training Material Appointments/Booking Team
RMS Training Videos System Support
Step by step guide to making the desktop app visible
Configure My Apps for Reports
Forgotten your Docman password?
Technical Documents
Creating a Desktop Shortcut to Docman 10
Docman 10 API Codes
Docman 10 Accepted and Excluded File types
Docman Cloud Enabler App Deployment
Docman Desktop Application Deployment
Docman Desktop Services
Downloads Centre
Postman Configuration Tutorial
Using Docman 10 With a Proxy Server
Warranted Environment Specification (WES)
Customer Support
- All Categories
- Referral Management System (RMS)
- Generating Certificate Signing Request (CSR) For ERS Integration
Generating Certificate Signing Request (CSR) For ERS Integration
1. Open Internet Information Services (IIS) Manager
Click Start, Control Panel, System and Security, Administrative Tools, and then select Internet Information Services (IIS) Manager.
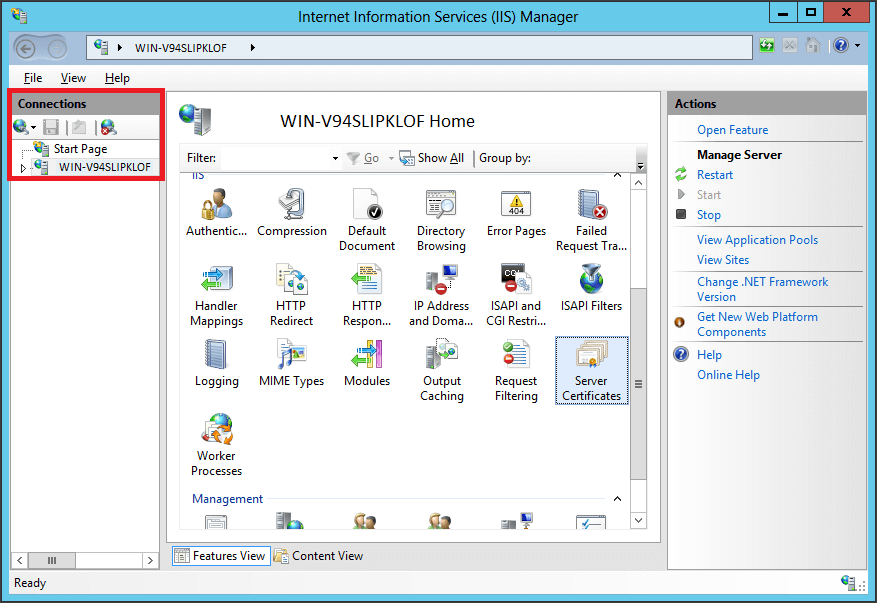
2. Select the server where you want to generate the certificate
In the left Connections menu, select the server name (host) where you want to generate the request.
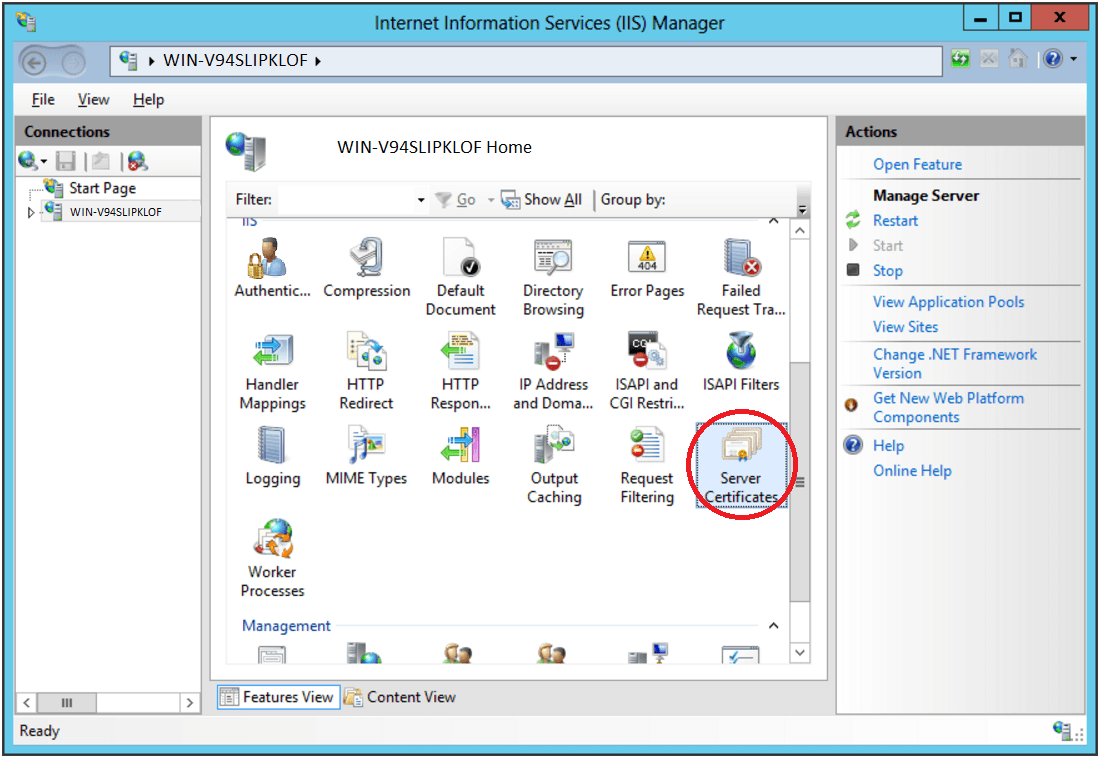
3. Navigate to Server Certificates
In the center menu, click the Server Certificates icon under the Security section near the bottom.
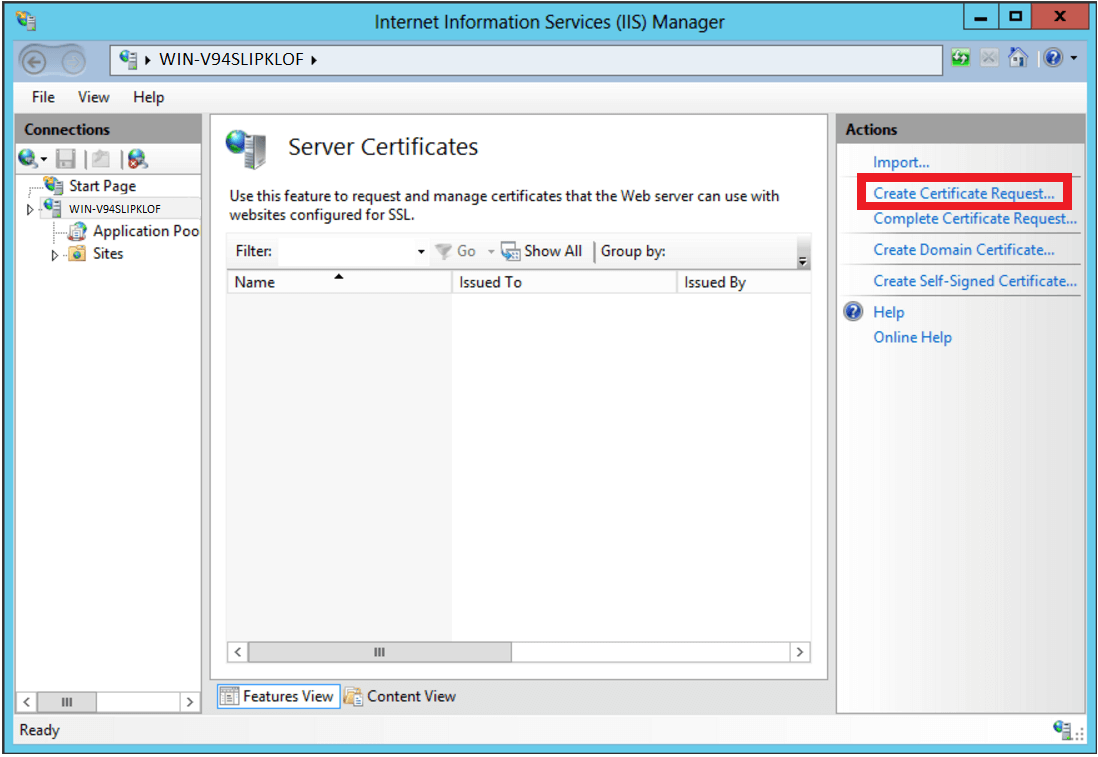
4. Select Create a New Certificate
In the right Actions menu, click Create Certificate Request.
5. Enter your CSR details
In the Distinguished Name Properties window, enter in the required CSR details and then click Next.

Note: To avoid common mistakes when filling out your CSR details, reference our Overview of Certificate Signing Request article.
6. Select a cryptographic service provider and bit length
In the Cryptographic Service Provider Properties window, select Microsoft RSA SChannel Cryptographic Provider and Bit Length of 2048, then click Next.
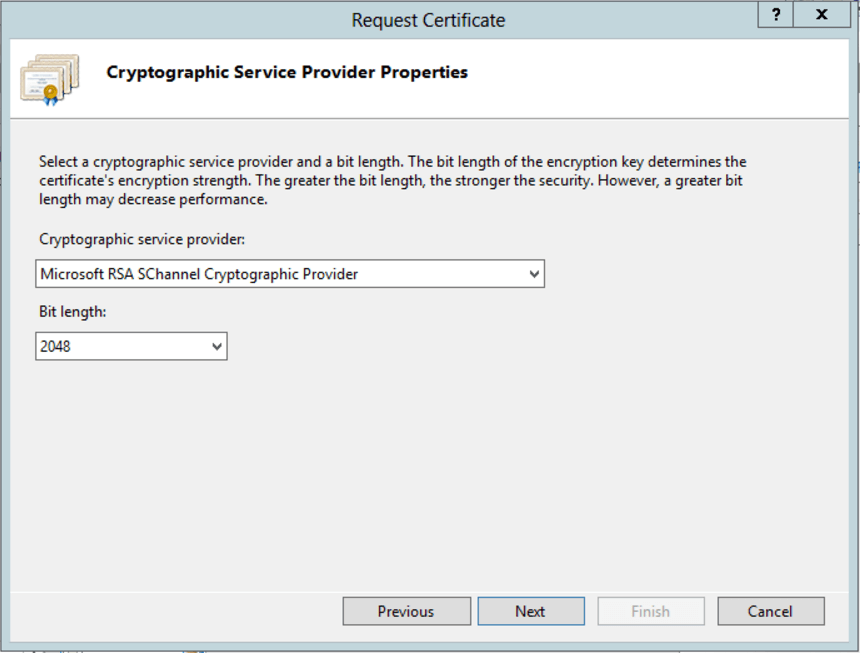
Note: Bit Length: 2048 is the current industry standard. You may choose a larger key size, but only if you have a requirement to do so, as longer key lengths increase latency and may reduce compatibility.
7. Save the CSR
Click Browse to specify the location where you want to save the CSR as a “.txt” file and click Finish.

8. Generate the Order
Locate and open the newly created CSR from the specified location you choose in a text editor such as Notepad and copy all the text including:
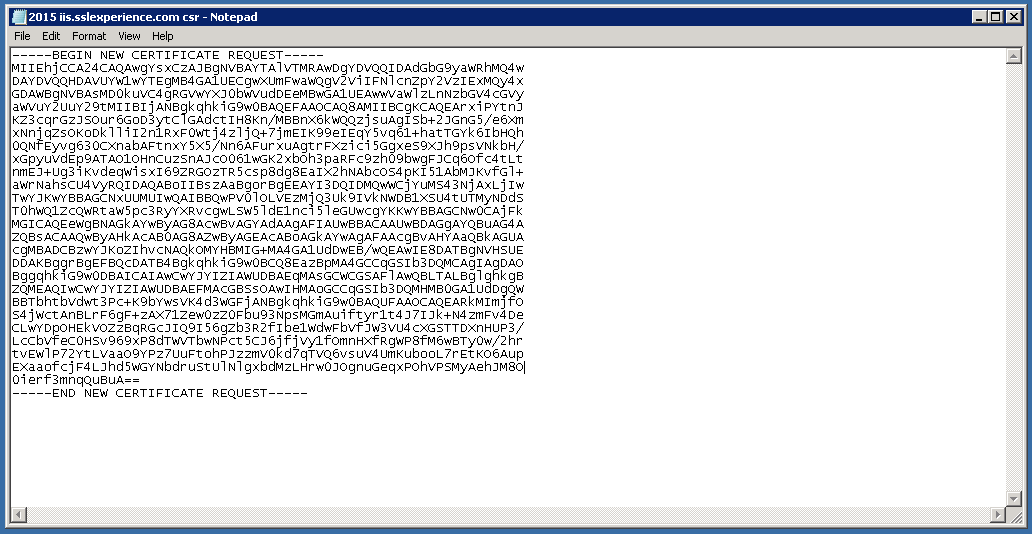
Give this CSR file to NHS Digital and they should return certificate, that you can then generate a pfx file from. Your will need to generate a pfx file from the certificate they send you from the same server you generated the CSR from.
Updated on August 5, 2020