READ2 to SNOMED-CT Mapping Guide
Clinical Code Mapping overview
This document has been created to support the process of switching from READ2 to SNOMED-CT Clinical Coding (referred to as SNOMED throughout this document) within Docman10, using a unique mapping tool, that has been developed to meet the required guidelines from NHS Digital.
The Clinical Code Mapping Tool will recognise existing READ2 codes within your Filing Templates, Intellisense Templates, the Pre-Defined Filing Codes list and the Pre-Defined Clinical Codes list.
Step 1 (chapter 2): When run, the mapping tool will attempt to map these codes automatically to an equivalent SNOMED code, using the NHS Digital assured mapping file.
Step 2 (chapter 3): Once the mapping tool has been run, the user is able to identify and deal with any unmapped codes.
Step 3 (chapter 4): Once mapping is successfully completed, the Clinical Code Type for Docman10 can then be switched from READ2 to SNOMED.
Switching to using SNOMED in Docman 10 does not need to be done in parallel with the clinical system.
The following steps will assist users to utilise the mapping tool in a structured and logical order.
Important notes
a. Once the mapping has been implemented, Docman10 can still be used as normal without issue. The process of switching from READ2 to SNOMED can be done independently and take as long as the practice requires. However, we would advise that you identify and rectify any missing or incorrect READ2 codes, using the READ2 to SNOMED Reporting Guide, before attempting to use the mapping tool.
b. There are no mandatory requirements to choose another code should an inactive or unsupported code be identified. (An inactive or unsupported code results where there is no map that exists between READ2 and SNOMED) However, code fields will remain blank if not amended. A new SNOMED code can be added to or amended in the template or list following the mapping process at any point.
c. We would recommend that any required amendments to existing READ2 codes are completed prior to running the mapping tool. Adding or amending a READ2 code during the mapping process may result in confusion between mapped and unmapped codes.
A note on Degrades:
When clinical codes move between systems, sometimes the receiving system may not understand the clinical code that was sent.
Clinical systems may be using different versions of the same terminology. In the UK, terminologies are updated regularly, usually 6 monthly. When they are updated, new codes are added, and old codes are deprecated. If one system updates before another, then for a period of time it may contain new codes that systems using an older version do not understand.
Where codes are not understood by clinical systems, having a degrade process enables improved interoperability and related functionality. Having appropriate degrade codes enables structure and semantics to be retained.
A Degrade flag in the clinical system is used to highlight this, and is normal.
The Degrade is simply showing that the SNOMED code is not recognised in your clinical system. The clinical entry will still be recorded within the patient record, but will not be searchable for local or QoF reporting, until the clinical system SNOMED code list is updated. If this occurs, you may wish to consider choosing a different code (to ensure continued local and QoF reporting is accurate).
In summary, a Degrade is not incorrect, but you may wish to find a more suitable code, if the item is part of an important search or report.
Using the Mapping tool
Access Settings from the Home screen
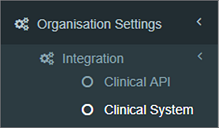
Choose Organisation Settings > Integration > Clinical System
Map READ2 to SNOMED
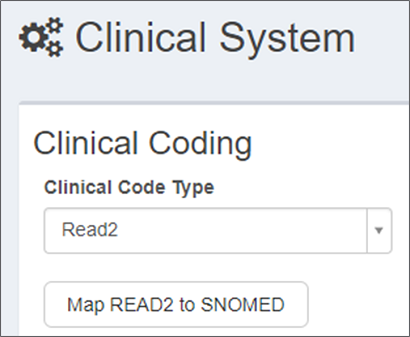
Choose the option to Map READ2 to SNOMED
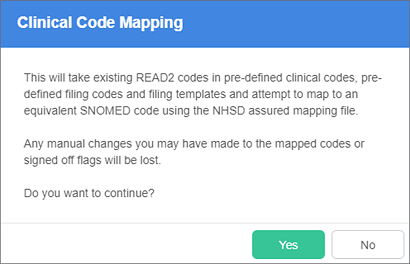
Once you have read the following prompt, choose Yes to continue
Once the mapping tool has been run, the following message will appear very briefly in the bottom right corner.

Checking the results
Filing Templates and Intellisense Templates
Once the Mapping tool has been run, each area for Coding needs to be checked and actioned as necessary.
Filing Templates
Choose Settings > Filing > Templates

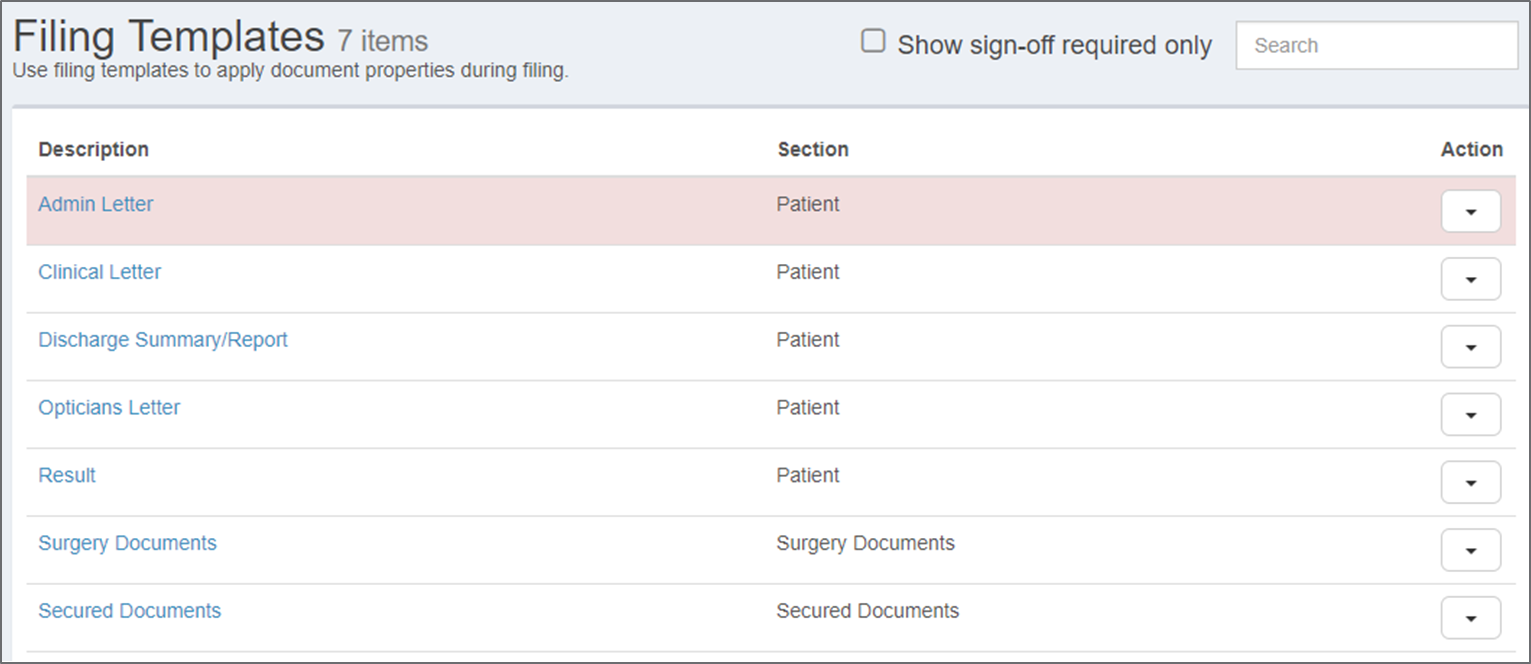
Find all templates highlighted red by scrolling through the templates by using the page selector at the bottom right of the screen.
Edit the template by selecting the Description link on the left, or by selecting the Action drop down on the right.
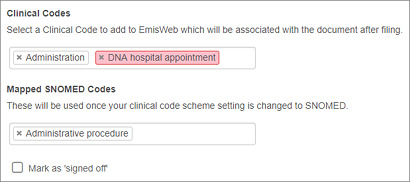
Scroll to the bottom of the Template Details screen, any codes that have not mapped will be displayed in red. In this example, the code can be removed, as not appropriate for an Admin letter template. (Select the cross to the left of the item to remove).
If the code has not been mapped, select the Mapped SNOMED Codes box to search for the appropriate code to use.
Tick the Mark as ‘signed off’ box and choose Save to complete.
Continue in this way until all templates are no longer highlighted in red.
Intellisense Templates
Choose Settings > Filing > Intellisense Templates


Find all templates highlighted red by scrolling through the templates by using the page selector at the bottom right of the screen.
Edit the template by selecting the Description on the left, or by selecting the Action drop down on the right.
Scroll to the bottom of the Template Details screen, any codes that have not mapped will be displayed in red.
In this example, the code needs to be amended to a SNOMED code.
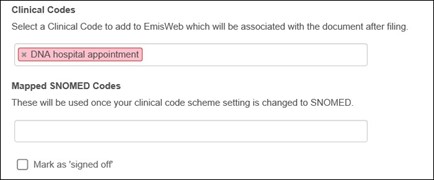
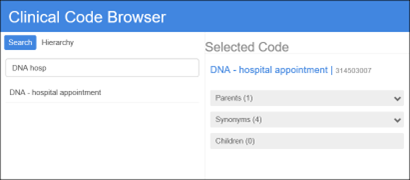
Select the field under Mapped SNOMED Codes to open and search for an equivalent SNOMED code from the Clinical Code Browser. Search by typing in the description required in the Clinical Code Browser search field
Once an appropriate SNOMED Code has been found, choose Confirm to add to the template.
The chosen SNOMED code will appear in the Mapped SNOMED Codes field
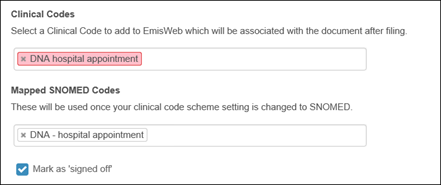
Tick the Mark as ‘signed off’ box and choose Save to complete. Continue in this way until all templates are no longer highlighted in red.
Pre-defined Filing Codes list
Choose Settings > Filing > Pre-defined Filing Codes
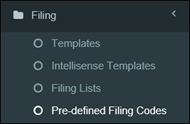
The list is split into three sections, with the current READ2 Filing Codes listed in the top section.
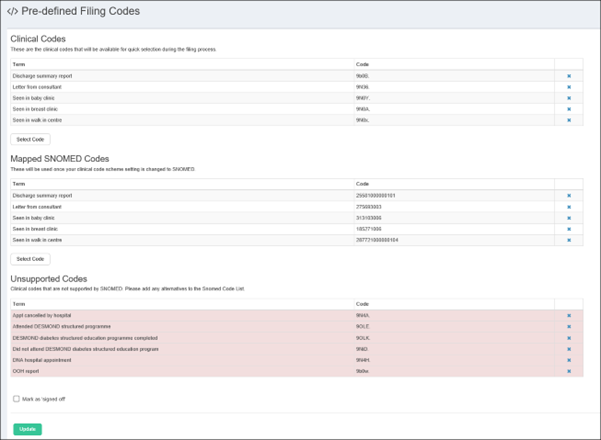
Mapped SNOMED Codes are shown in the 2nd section.
Unsupported Codes are highlighted in red at the bottom of the screen. Unsupported codes are listed here, as they do not map automatically.
A decision must be made to either find an alternative suitable equivalent SNOMED code, or leave as unmapped.
Using the Unsupported Codes list for guidance, manually add the alternative suitable equivalent SNOMED Codes, using Select Code (directly under the Mapped SNOMED Codes list).
This will open the Clinical Code Browser (as previously shown) to search for a suitable code.

Once all Codes have been reviewed and the relevant equivalent codes have been added to the SNOMED list, choose Mark as ‘signed off’ by ticking the box, and choose Update to save.
Pre-defined Clinical Codes list
Choose Settings > Clinical Coding > Pre-defined Clinical Codes
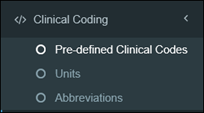
Again, the list is split into three sections, with the current READ2 Clinical Codes listed in the top section
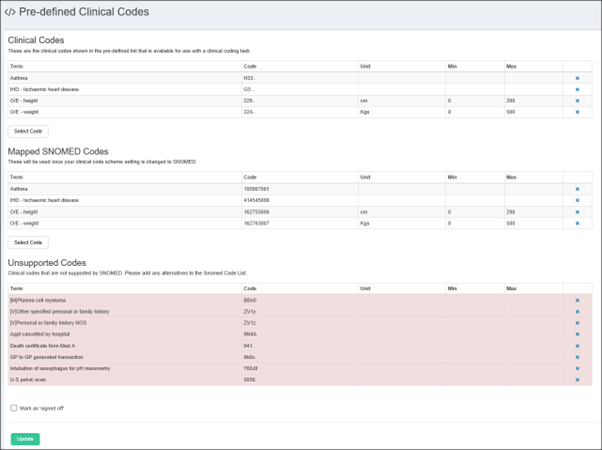
Mapped SNOMED Codes are shown in the 2nd section.
Unsupported Codes are highlighted in red at the bottom of the screen. Unsupported codes are listed here, as they do not map automatically.
A decision must be made to either find an alternative suitable equivalent SNOMED code, or leave as unmapped.
Using the Unsupported Codes list for guidance, manually add the alternative suitable equivalent SNOMED Codes, using Select Code (directly under the Mapped SNOMED Codes list).
This will open the Clinical Code Browser (as previously shown) to search for a suitable code.

Once all Codes have been reviewed and the relevant equivalent codes have been added to the SNOMED list, choose Mark as ‘signed off’ by ticking the box, and choose Update to save.
Switching to SNOMED
Once all Codes have been reviewed, the final action is to change the Clinical Coding Type from READ2 to SNOMED
Choose Organisation Settings > Integration > Clinical System
At the top of the screen change the drop down box for Clinical Code Type to Snomed.
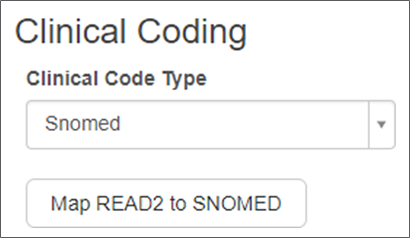
Select Update at the bottom of the screen.
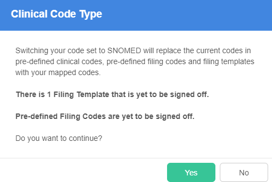
You will be prompted to ensure that you are happy to proceed with the switch to SNOMED.
In addition, any list or template entries NOT marked as ‘signed off’ will be prompted again. Select Yes to complete the process, or No to review items that have not been ‘signed off’. There is no need to choose the Update button at the bottom of the screen.
Once all steps have been completed, you can continue to use Docman 10 in the same way as before.
SNOMED Code names/numeric strings will be visible in the same way as READ2 Codes were prior to the switch process.
Important Notes.
a. During the Mapping process, it is possible to amend the READ2 lists. Although this is possible, it is recommended that you either review and update your lists prior to mapping, or once the switch to SNOMED is complete. This will save any confusion with mapped and unmapped Codes.
b. Once the Mapping has taken place, and the switch to SNOMED has been updated the Map READ2 to SNOMED button will NOT be visible. You are unable to reverse the process.
c. It is not advisable to switch the Clinical Code Type back to READ2. It should not be necessary. If you feel you may need to do this, please contact Docman Service Desk via normal channels (phone or online)
As a post switch check, the reports can now be run again, to confirm the new SNOMED coding in place.
A note on Abbreviations
Considerations to be aware of, if you have created a list of abbreviations for clinical coding
You may have configured Docman to respond to abbreviations for local Clinical Coding terms (e.g. using “MIA” as an abbreviation for Acute Myocardial Infarction).
Please be aware that these settings do not map the abbreviation to a code, they simply allow the system to search for the key word (i.e. MIA) that you have associated with that code (Acute Myocardial Infarction).
Since there is no mapping as such, as you switch over to SNOMED, the principle still applies. However, now the system will search for the key word within the SNOMED coding structure, rather than READ2.
Please be aware that it may not result in the most accurate code that you require, and you may want to create the abbreviation again to ensure the correct code is associated.
To configure abbreviations
Choose Settings > Clinical Coding > Abbreviations
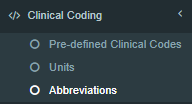
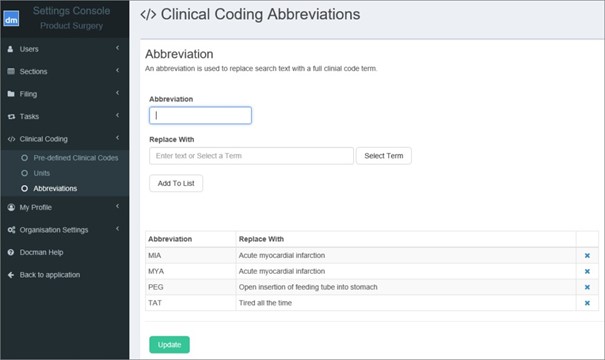
To create an abbreviation
i. Add the abbreviation you want to use
ii. Use the ‘Select Term’ button to choose the clinical code you need
iii. Find the clinical code using the term browser and confirm
iv. Select the ‘Add To List’ action on screen
v. Save the changes using the ‘Update’ button at the bottom of the page
Using abbreviations
When abbreviations have been configured you can use them during a clinical coding task. If you are searching for codes using the interactive tools e.g. the lasso tool, then an abbreviation can be selected on the document and the search results will return the terms that have been associated with the abbreviation in settings.
Abbreviations can also be entered using the term browser and the search results will return the terms that have been associated with the abbreviation.
Once the Switch to SNOMED has taken place, it is recommended that you now check the abbreviations, and recreate new entries if these do not work as expected.